
Creating Rule Blocks on Continue Hub: A Developer's Guide

With guest Dan Cleary from PromptHub
As developers, we constantly seek ways to make our AI assistants work better for our specific needs. One of the most powerful yet underutilized features of Continue is the ability to create custom rule blocks that shape how your AI coding assistant behaves during chat interactions.
In this guide, we'll walk through creating rule blocks on Continue Hub, explore real-world examples of effective rules, and show you how these small customizations can significantly enhance your coding experience.
What are Rule Blocks?
Rule blocks are sets of instructions provided to chat models that guide their behavior when responding to your queries. These rules are inserted into the system message for all chat requests, effectively acting as guardrails and style guides for your AI assistant.
Think of rules as the "preferences" you'd communicate to a human colleague about how you want code written for your team or project. They help ensure consistency and adherence to your preferred practices.
Why Create Custom Rule Blocks?
- Enforce Coding Standards: Ensure all suggestions follow your team's conventions
- Improve Response Quality: Get more relevant and precise answers
- Tailor for Specific Technologies: Customize behavior for particular frameworks or languages
- Fix Annoying AI Behaviors: Minimize unnecessary explanations or apologies
- Boost Productivity: Shape the assistant to work the way you do
Creating a Rule Block on Continue Hub
Let's walk through creating a custom rule block:
Step 1: Navigate to Continue Hub
First, visit hub.continue.dev and log in to your account.
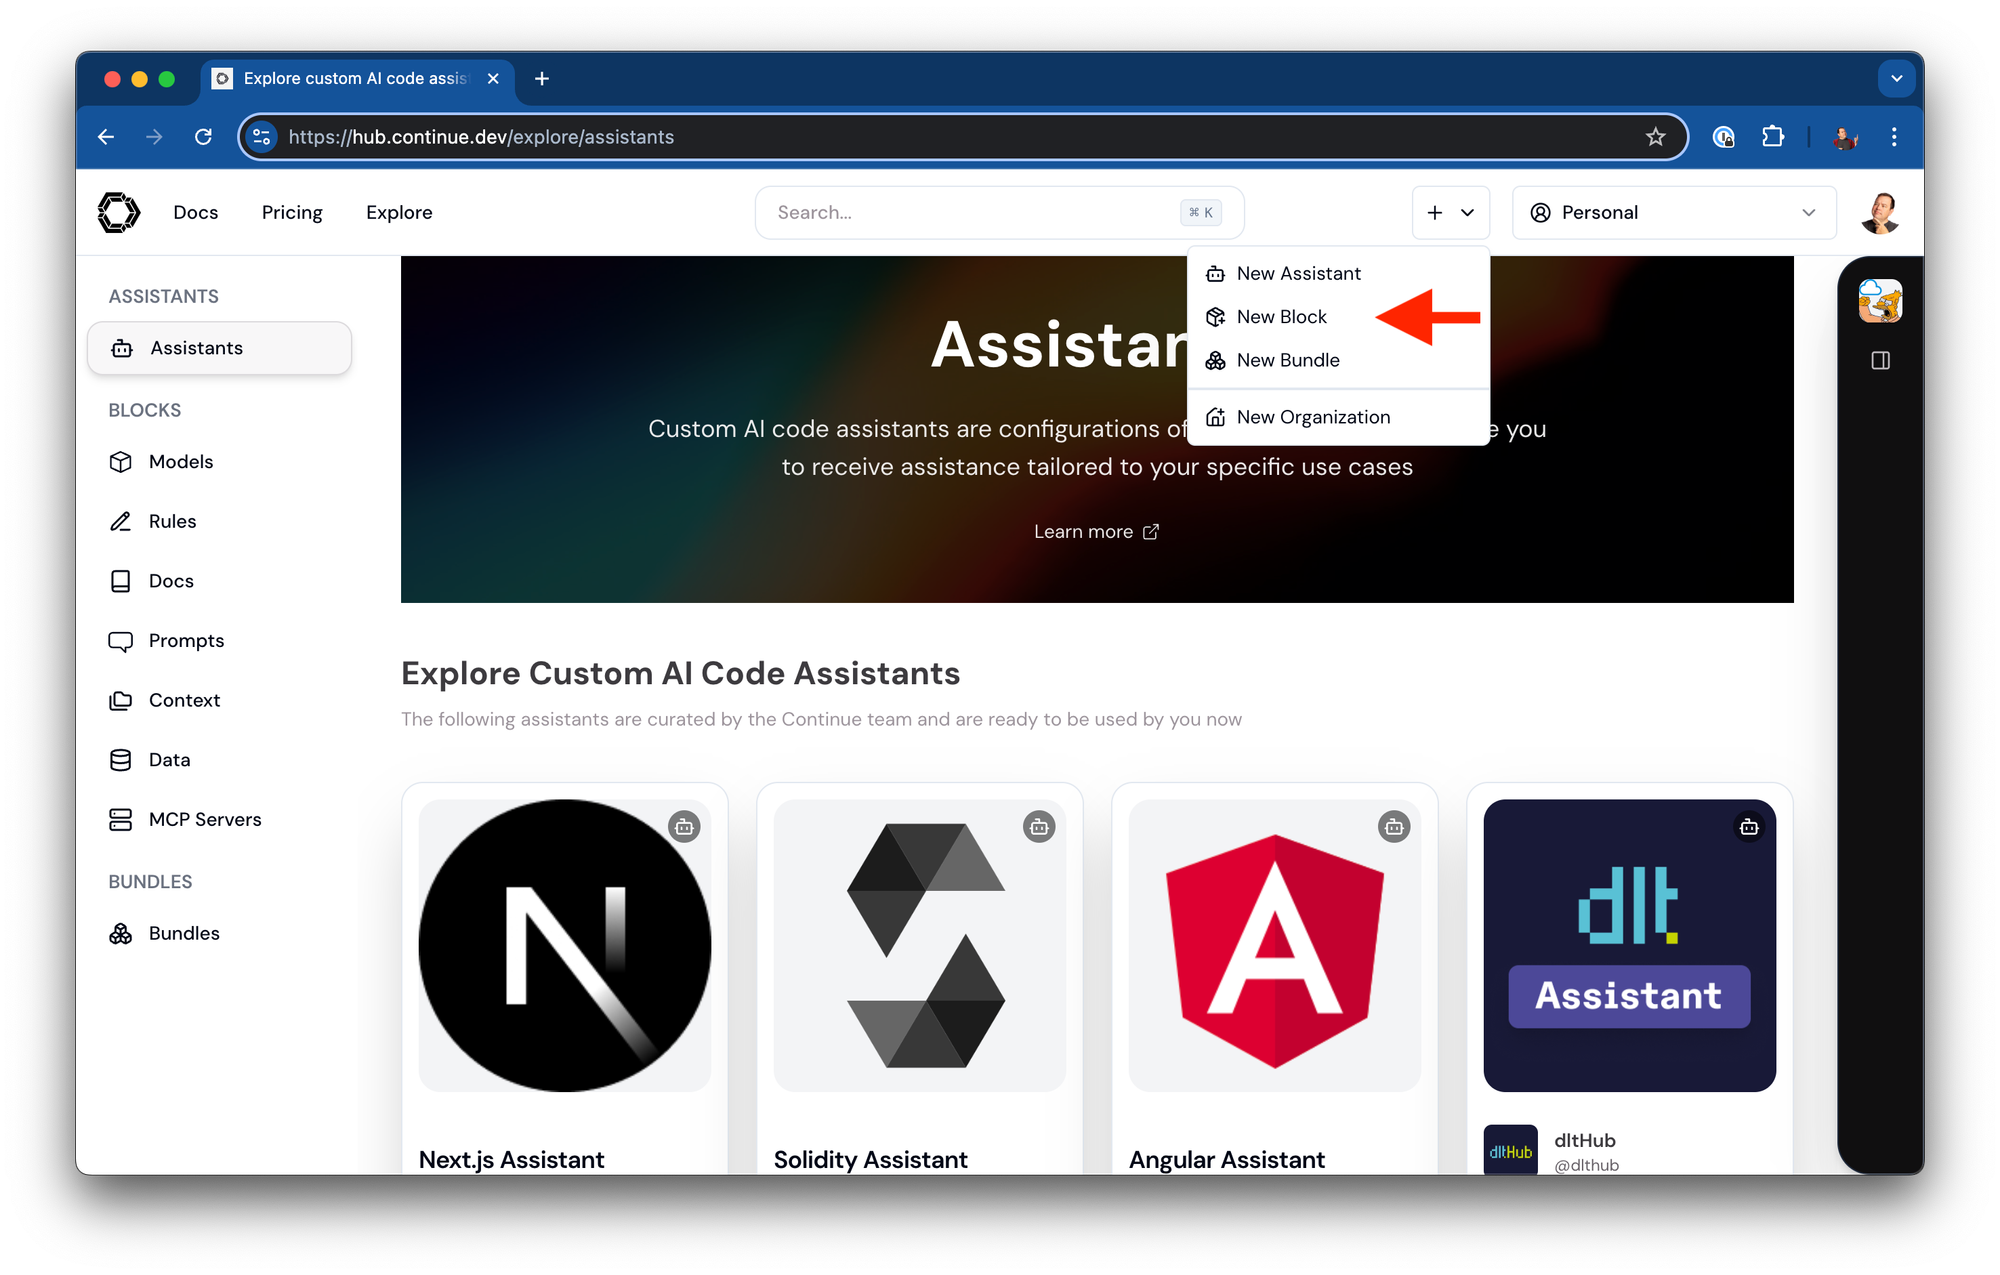
Step 2: Create a New Block
From the main hub page, click the "+" button in the top right corner, then select "New Block" from the dropdown menu.
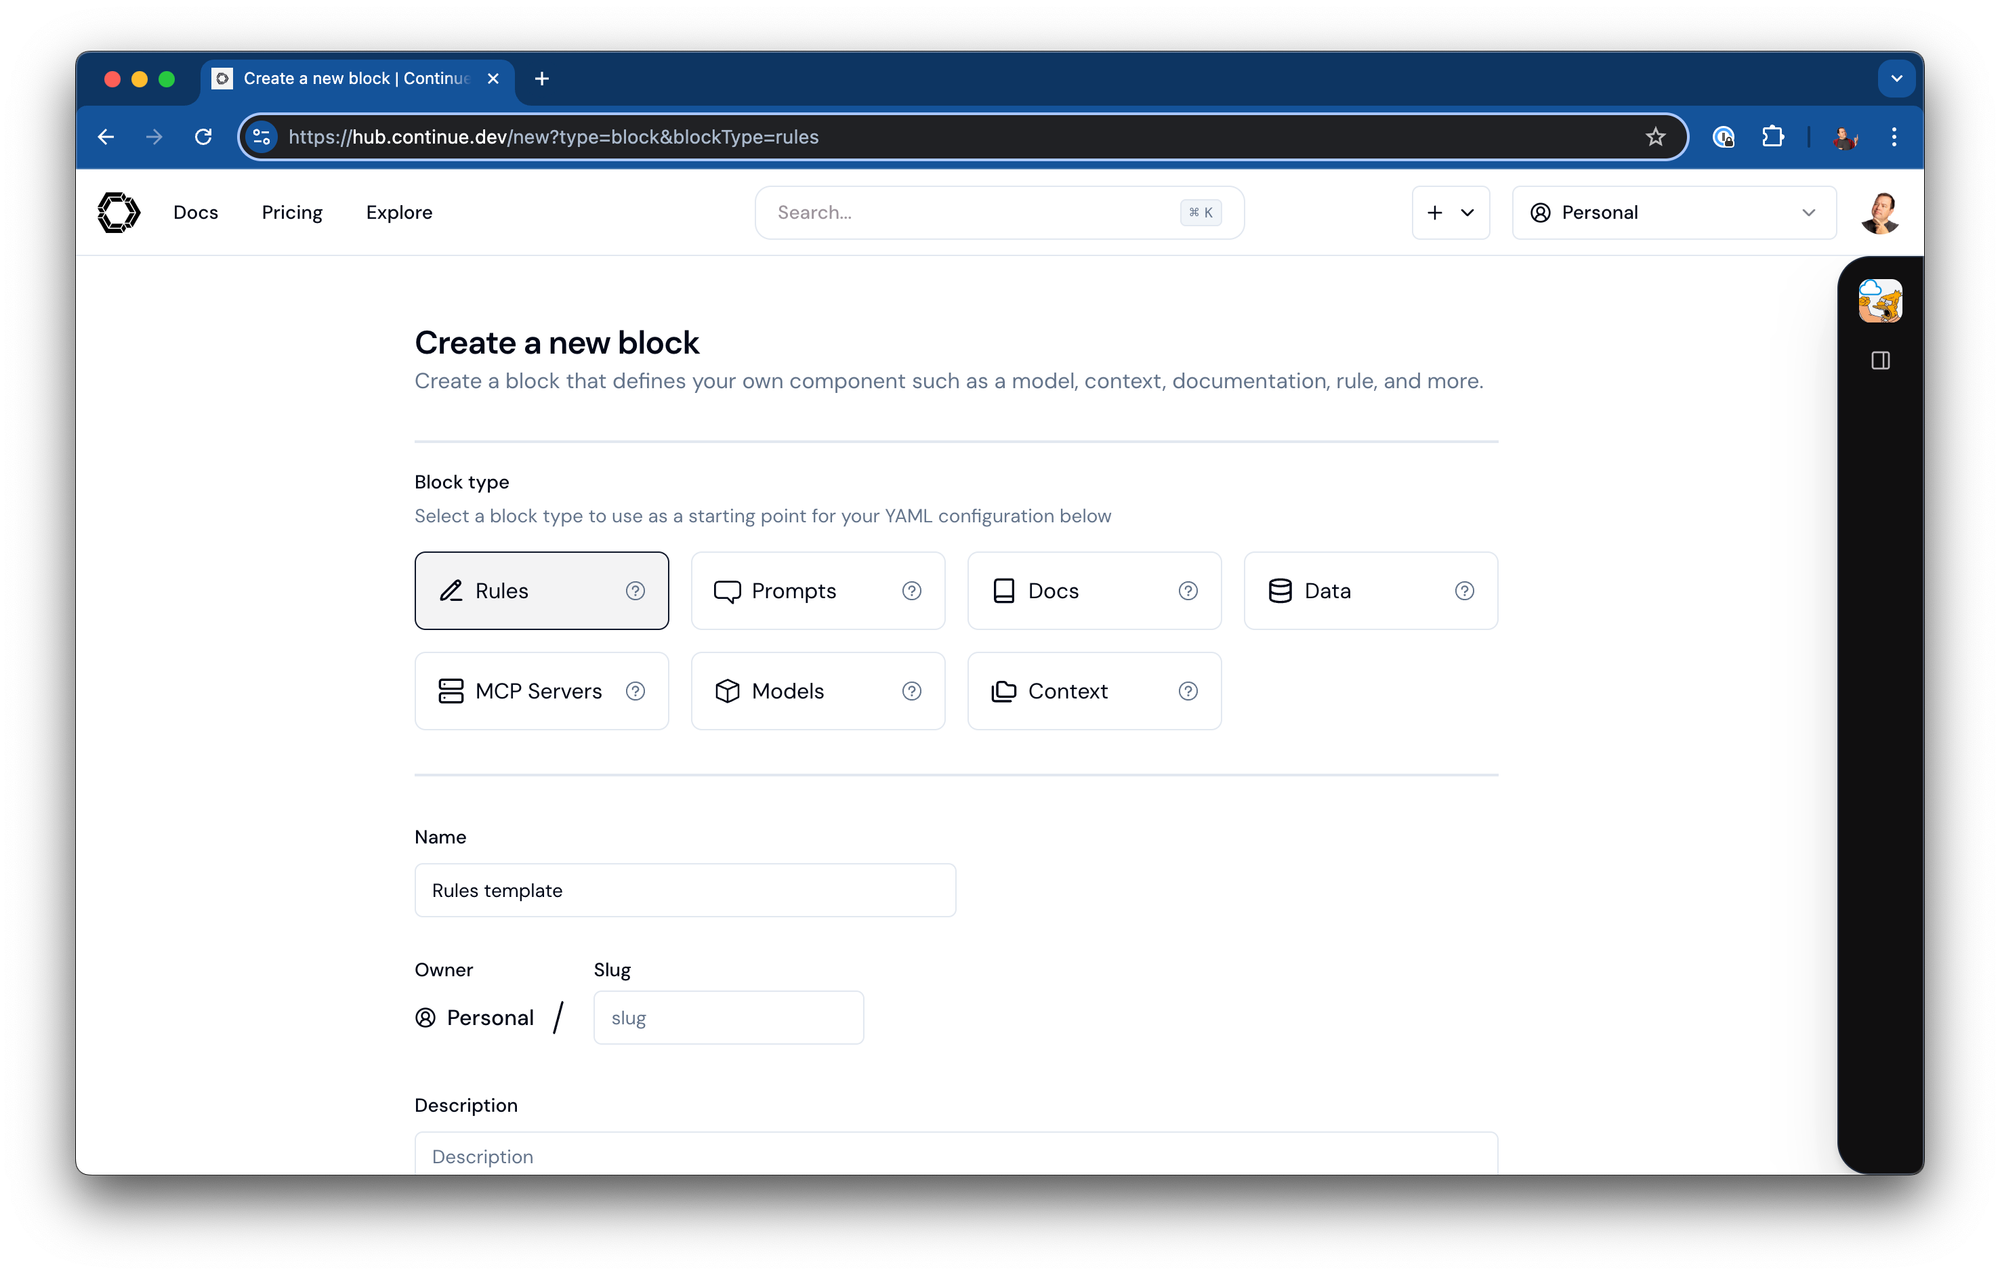
Step 3: Select Rules as the Block Type
On the creation page, select "Rules" as your block type. This tells Continue that you're creating a set of instructions to control how the chat model behaves.

Step 4: Define Your Rule Block
Now you'll need to provide:
- Name: A descriptive name for your rule block (e.g., "Python Best Practices")
- Slug: A URL-friendly identifier (auto-generated, but can be customized)
- Description: A brief explanation of what your rules accomplish
Step 5: Write Your Rules
In the content editor, you'll write the actual rules. These can be simple instructions or complex guidelines depending on your needs. You can use either plain text or YAML format:
rules:
  - Always annotate Python functions with parameter and return types
  - Write Google style docstrings for classes and functions
  - Prefer list comprehensions over map() and filter()
  - Handle exceptions specifically instead of using bare except clauses
  - Use snake_case for variables and function names
Step 6: Save and Publish
Once you're satisfied with your rules, click "Create" to publish your rule block. It will now be available to add to any assistant you create.
Real-World Rule Examples
Let's look at some effective rule block examples for different scenarios:
For Frontend React Development
  - Use functional components instead of class components
  - Use hooks for state management and side effects
  - Define TypeScript interfaces for component props
  - Use Tailwind CSS for styling instead of CSS modules
  - Modularize components into smaller, reusable pieces
  - Use lowercase with dashes for directories (e.g., components/auth-wizard)
  - Favor named exports for components
For Go Backend Services
  - Follow standard Go project layout
  - Return errors rather than using exceptions or panics
  - Use context for cancellation and timeouts
  - Utilize Go's built-in concurrency features when beneficial for API performance
  - Implement graceful shutdown for all services
  - Write table-driven tests using subtests
  - Use meaningful and consistent naming conventions
For Python Data Science
  - Always use type hints for function parameters and returns
  - Document functions and classes with clear docstrings
  - Prefer pandas vectorized operations over loops for data manipulation
  - Use pathlib instead of os.path for file operations
  - Structure code to be reproducible and deterministic
  - Cache intermediate results of expensive computations
  - Include meaningful comments for complex algorithms
Integrating Rules with Your Assistants
Once you've created a rule block, you can add it to any assistant:
- Navigate to your assistant configuration
- Add your rule block by clicking "Add Block" and selecting from available rules
- Save your assistant configuration
Remember that you can combine multiple rule blocks in a single assistant, allowing you to mix and match guidelines for different aspects of your development workflow.
Beyond Hub: Project-Specific Rules
While Continue Hub is excellent for creating shareable rules, you can also define project-specific rules using a .continuerules file in your project root. This approach is perfect for rules that are specific to a single codebase.
Simply create a text file with your instructions:
# .continuerules
Always follow the project's existing patterns for error handling.
Use the existing logging framework instead of print statements.
Follow the project's established folder structure for new modules.
Conclusion
Rule blocks are a powerful way to customize your AI coding assistant experience, ensuring that suggestions align with your team's standards and preferences. By taking a few minutes to create thoughtful rules, you can dramatically improve the quality and relevance of your AI assistant's responses.
Our friends at PromptHub wrote a blog post to to explore best practices in creating effective rules. Their analysis of 100+ rule files has some valuable patterns that you can adapt for your own use cases.
Ready to get started? Sign up for Continue and begin creating your own custom AI code assistants today!